
Sprouts are a delicious addition to many dishes. Growing sprouts is easy - even without a sprout glass.

In winter, the supply of vitamins from your own garden is often small. But sprouts or seedlings can be grown indoors even at this time of year. They provide vitamins and nutrients and refine wraps, salads, soups and more. In this article you will learn what you need to consider when growing sprouts and how to grow sprouts without a sprouting glass.
Draw rungs
Sprouts are the germinating seeds of plants that are suitable for consumption. If you want to grow sprouts, you only need a few materials and the sprouts are ready to eat after a few days.
Which seeds are suitable for sprouts?
In addition to the well-known soybean sprouts, a variety of other plant species can be used to grow sprouts. In our overview article on sprouts we have summarized many suitable plants. Garden centers and online shops often offer sprout seeds that have been specially cleaned and have a low contamination and pathogen load. This reduces the risk of bacteria or mold spreading through the sprouts and making you ill from eating them.
The right place for sprouts
Sprouts need little space to grow and otherwise make hardly any demands on the culture. The sprouts germinate best in a jar in a bright place without direct sunlight at around 18 to 22 °C.

Tip: Incidentally, you do not need soil for planting sprouts. The seedlings have such a short life that the energy reserves from inside the seed are completely sufficient.
Instructions: growing sprouts without a seed jar
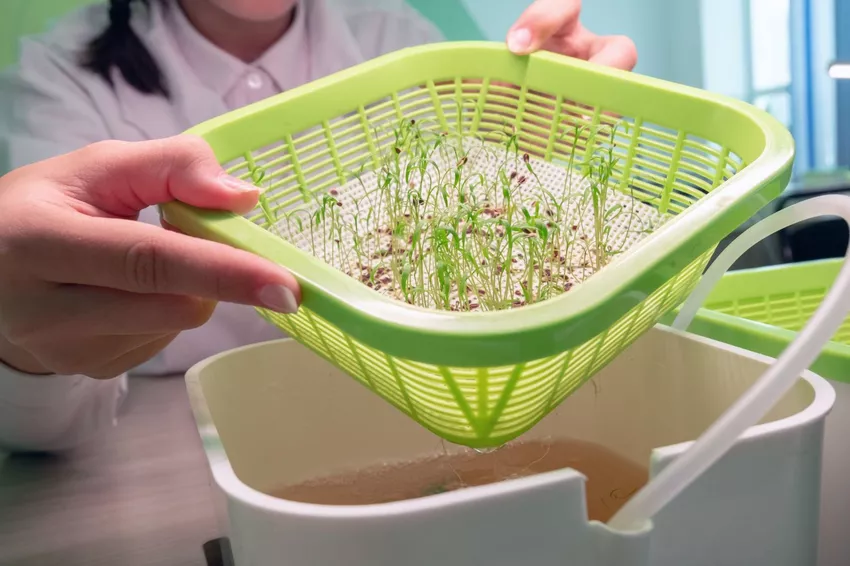
If you don't have a sprout jar, you can use a clean mason jar with a filter cloth. Germ or sprout trays, in which the seeds lie on a sieve directly above a water tray, are particularly pretty to look at.Proceed as follows to grow your own seed tray:
- Clean the seeds thoroughly under lukewarm tap water.
- Then the seeds are made to swell. Depending on seed size, this should take around 6-12 hours. Hard-shelled, large seeds are kept longer in the spring bath.
- Drain the water and spread the seeds evenly on the sieve of the germination tray. The lower bowl is then filled with water until the water just touches the sieve.
- Change the water daily for the next few days and spray the young seedlings as needed.
- The sprouts are ready to eat after about 3 - 5 days, when the cotyledons are visible but not fully developed.
Tip: If you let the small sprouts continue to grow for a few days, they are called microgreens. Learn how to grow microgreens at home with our special article.
The right care
If you grow sprouts yourself, you should always ensure a clean environment. All utensils must be cleaned before use. Also, wash your hands before working with sprouts. Because the humid and warm germination conditions ensure that the sprouts germinate, but are also an ideal breeding ground for bacteria and mold. You should check the water level in the bowl regularly and refill it if necessary. The water in the bowl can be changed once a day to keep the sprouts hygienic.
Harvest sprouts
When your sprouts have finished germinating after a few days, small sprouts such as alfalfa sprouts, cabbage sprouts, onions or beetroot are simply removed from the bowl by hand. With larger sprouts, such as those of sunflowers, chickpeas, beans or radishes, you can also cut off the sprouts with scissors just above the sieve.

If you've got the urge to grow your own sprouts, read our article on broccoli sprouts. There you will learn why broccoli sprouts are particularly he althy and what needs to be considered when growing them.